November 26, 2017 13768 views
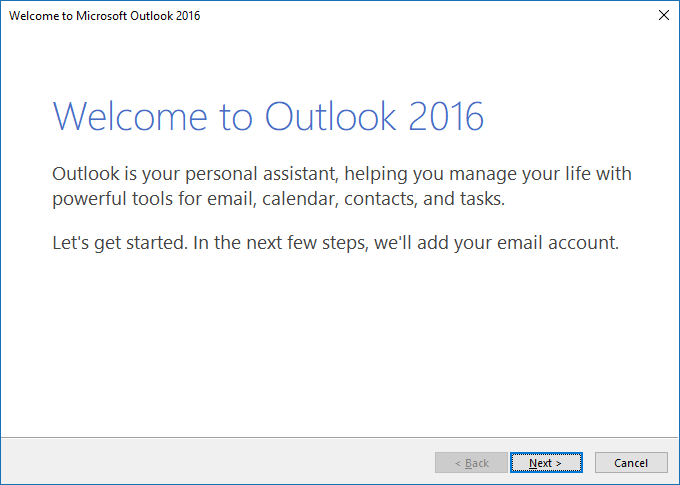
The first time you open Outlook 2016, this window will be shown:
- Click Next to begin the configuration setup
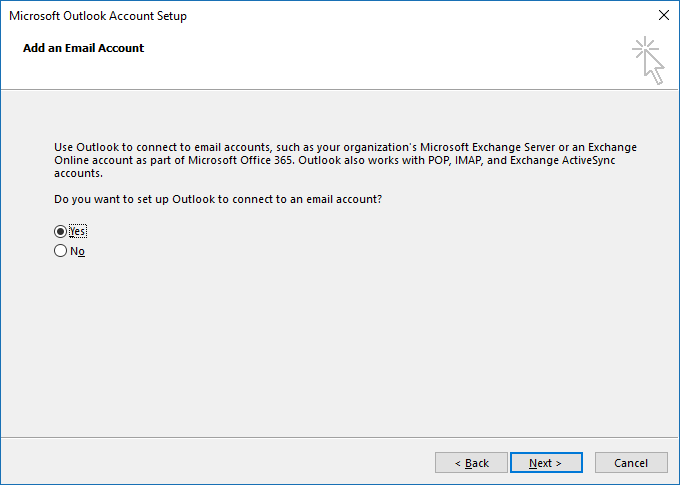
2. In the Add an Email Account wizard displayed, you’ll be asked Do you want to set up Outlook to connect to an email account? Ensure the radio button next to Yes is selected, then click Next.
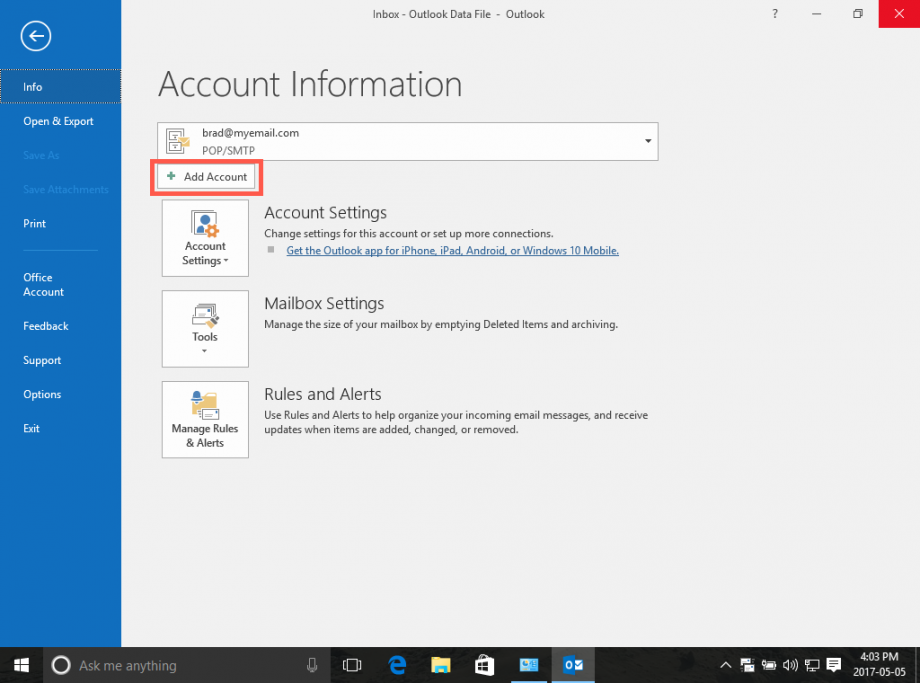
2a. In case you’ve already created another account and you see a window like the one below, click the File tab at the top of the window and in the Info category, click the Add Account button.
3. Click on Manual setup or additional server types to manually configure email account

4. In Add Account panel, choose POP or IMAP :

5. In the next window, enter following settings:
- Your name: you should enter your own name as you would like it to appear on the messages you send.
- Email Address: enter your own email address
- For incoming and outgoing mail servers you should use pigeon.clari.net.au
- User name and password: Enter your email address (eg username@clari.net.au) and the current password for this particular mailbox.
- Leave the “Require logon using Secure Password Authentication (SPA)” option unchecked.

6. When you have entered your name, email address and server information, click on “More Settings …”
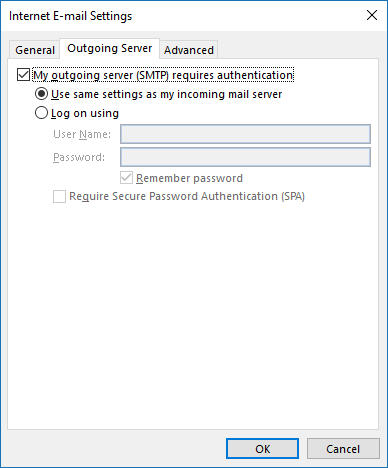
7. Click on the “Outgoing Server” tab. Mark the “My outgoing server (SMTP) requires authentication” option and leave the default “Use same settings as my incoming mail server” option selected.
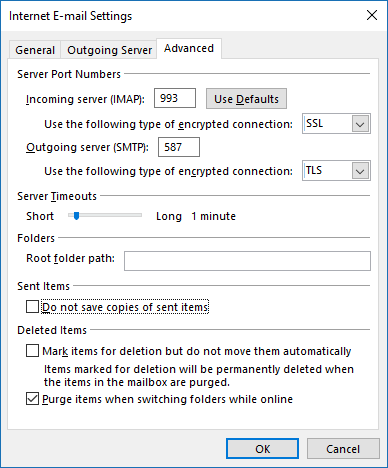
8. On the same window, click on the “Advanced” tab and set up the following:
- Choose SSL from “Use the following type of encrypted connection” drop down menu
- Set the “Outgoing server (SMTP)” port to 587
- Choose TLS from “Use the following type of encrypted connection” drop down menu
Leave the other options by their default values and click OK
Note for Outgoing server (SMTP): Sometimes Port 587 with TLS does not work. If that happens, try using port 465 using SSL
And that’s all! Click Next once you’ve filled all the information provided above and follow the wizard until your e-mail is configured successfully.