Clarinet Internet Solutions
  • Home
  • VPS and Dedicated Servers
  • Consulting
    • System Administration | Linux and FreeBSD
    • Website Optimization
    • Digital Marketing Strategy
    • Request Site SEO Report
  • Blog
  • Support
    • Configuration Guides
    • Webmail
  • Contact Us

Thunderbird with POP3, SSL and Authenticated SMTP

May 26, 2015 7000 views

Configuring Thunderbird

After installing Thunderbird you need to configure it for use with your Clarinet mailbox.

If you’ve not used Thunderbird before, the Mail Account Setup Wizard should start on its own. To open it manually, go to the Tools menu and click Accounts Settings. In the left pane of the Account Settings dialog box, click Account Actions and then select Add Mail Account.

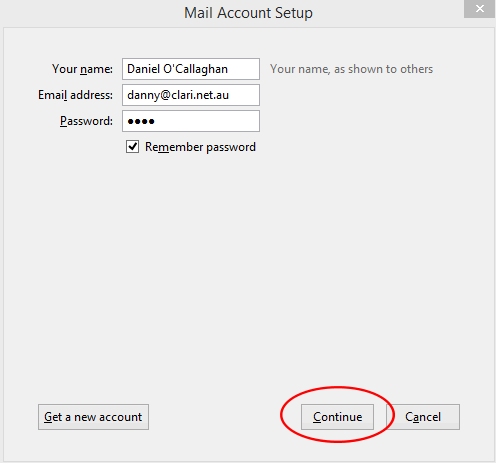
Enter your name as you want it to appear in the From field in outgoing mail and your email address. Then, click Continue.

new-account
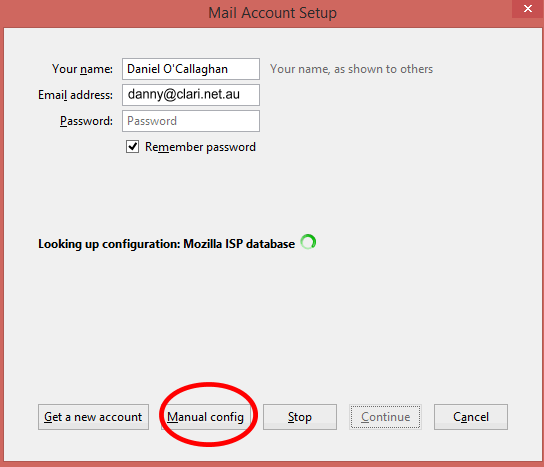
Thunderbird will attempt to find automatic configuration settings.  Click Manual config.

manual-config-1


manual-config-21

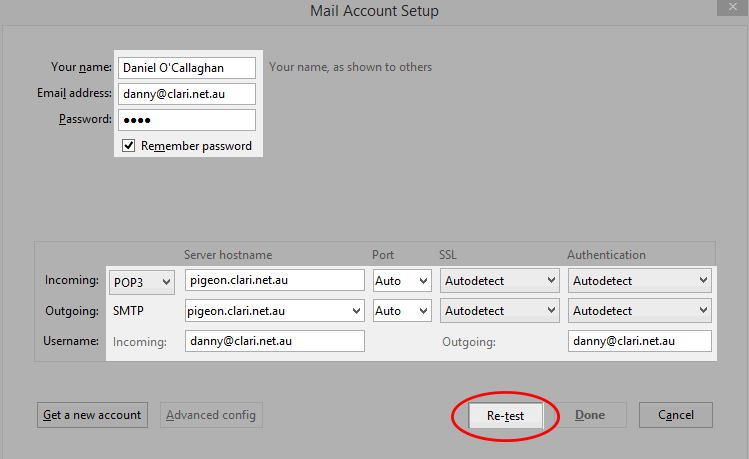
Ensure all settings are correct, with Server hostname pigeon.clari.net.au and the incoming server type as POP3

Click the Re-test button and click Done.

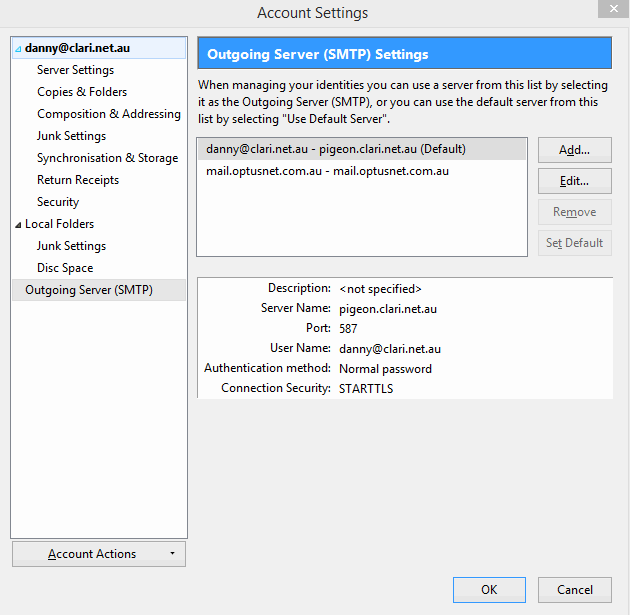
Finally, go to Tools -> Account Settings and check the settings for the Outgoing Server are correct.  Edit them if needed.


 outgoing

Recent Posts

  • New VPS and Dedicated Servers
  • Digital Marketing Strategy
  • Set up Gmail as Email Client
  • Outlook 2016 with IMAP and authenticated SMTP over SSL
  • Getting started with WordPress for SMEs
  • Vista email problems with timeouts
  • Set up e-mail with Microsoft Outlook Express Using Pop3
  • Thunderbird with POP3, SSL and Authenticated SMTP
  • Android email with POP3, SSL and authenticated SMTP
  • Set up Apple Mail with IMAP, SSL and authenticated SMTP
© 2017 Copyright Clarinet Internet Solutions. All Rights reserved.
Close Window

Loading, Please Wait!

This may take a second or two. Loading, Please Wait!